Scattering Systems
Let the machine help you with that!
In my previous post, I shared some information about mesh instancing and I think it would be useful to show how you can use that in practice too. Basically how to scatter details in a fast way but still have enough control.
More details faster
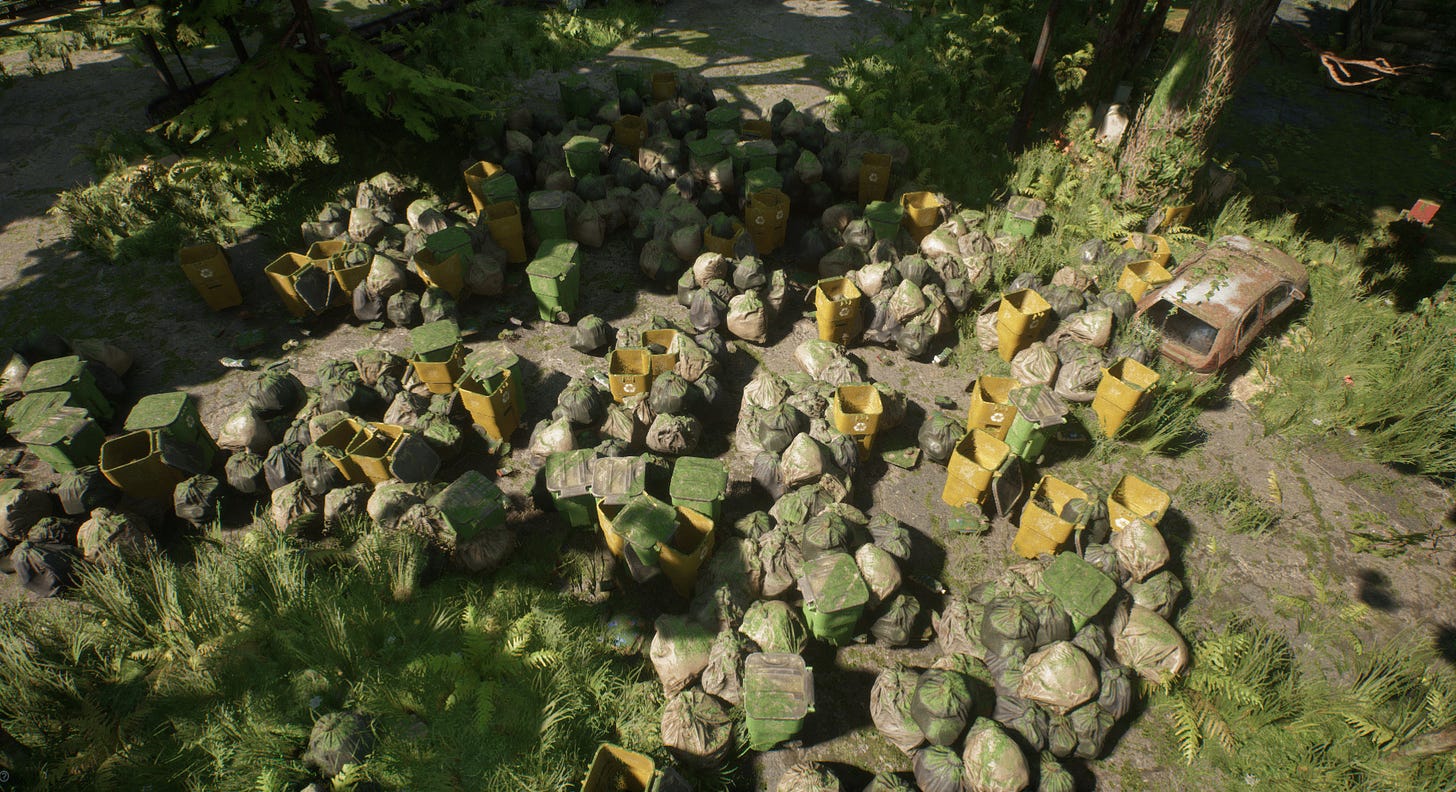
Nowadays we can add all sorts of small debris on top of things. This can be trash, some sort of foliage, rock debris etc… Some engines even allows to use GPU for that at runtime to produce very interesting results. This article will focus on how to use Unreal Engine’s blueprint system to have a handy tool for level design purposes.
Why create your own systems?
In Unreal you can use the foliage paint tool that have lots of useful options. It’s a good way to paint meshes and the system automatically handles mesh instancing. You can control density, min/max scales, culling distances, shadow settings etc. You have pretty much the full freedom but that can also make it slow to use for larger usage. You can also use procedural foliage spawning system that automates this process but that can end up being very complex and not optimal for different usages.
You can also use blueprints and create the same kind of system that can automatically scatter things the way you need. Both of these systems can create instanced meshes so performance is also pretty identical, in theory at least.
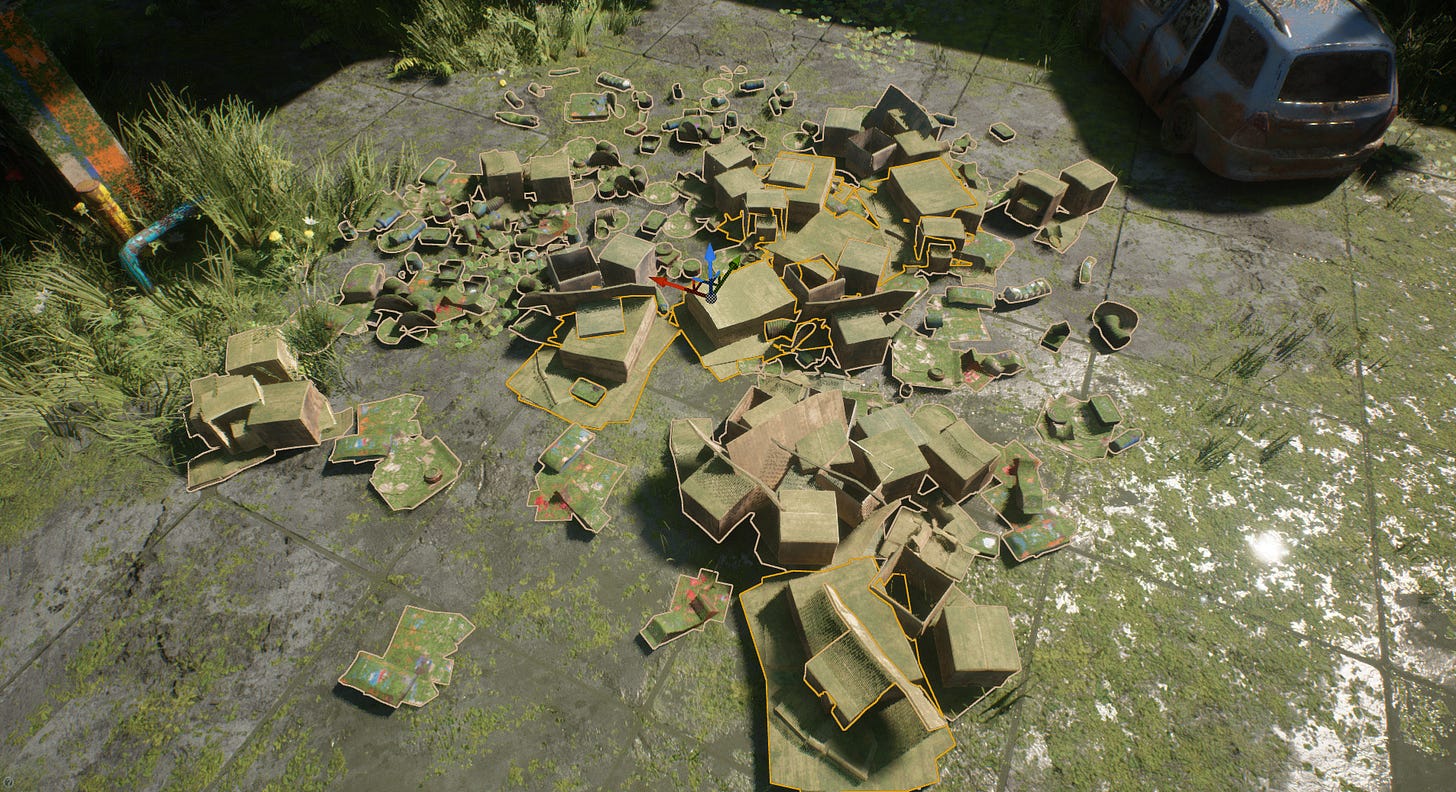
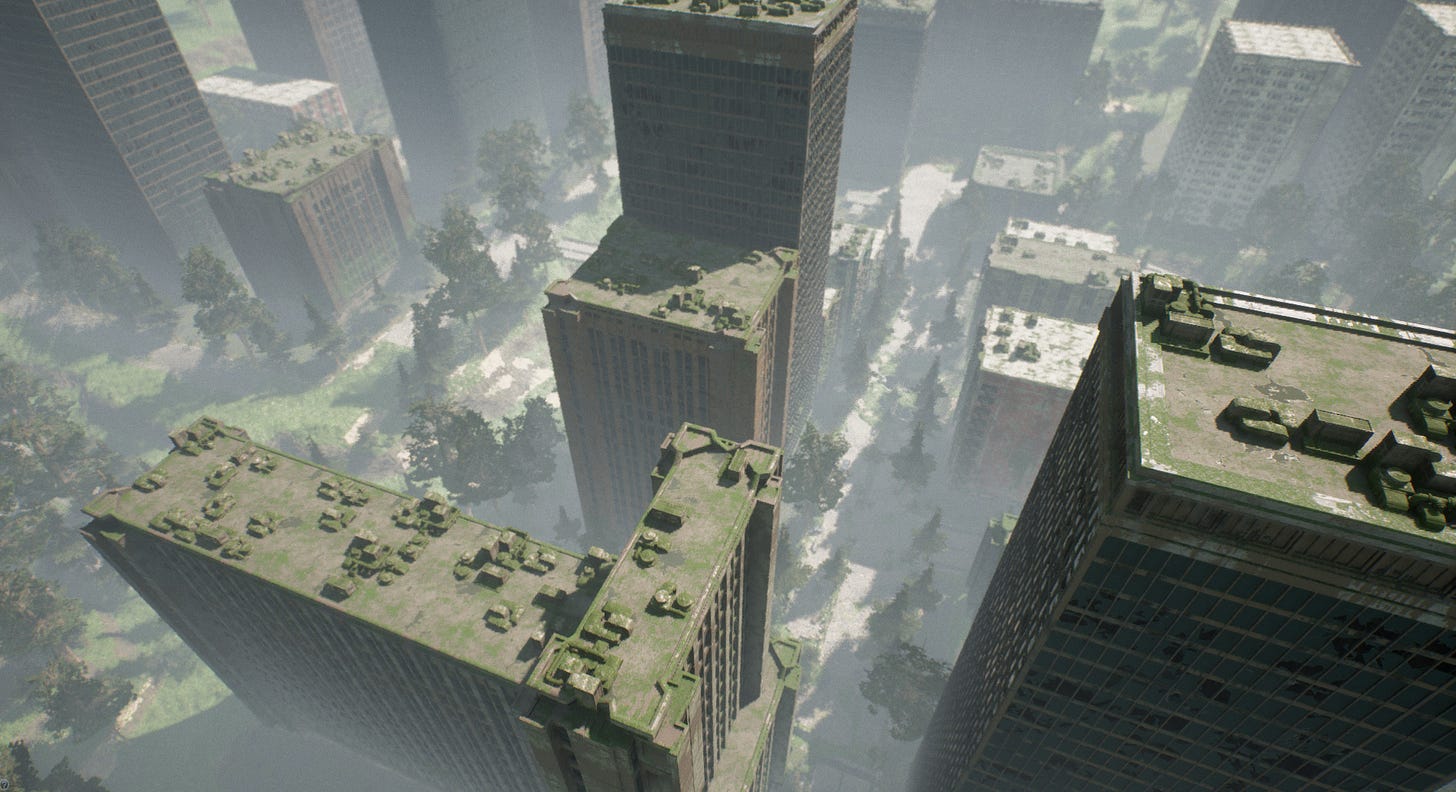
Let's say you have a floor that should have something on it. For this example we can say that “something” is small debris. You can manually paint that debris or you can create a blueprint that will randomly scatter those meshes there. You can even build that system inside that floor actor so every time you add that floor into your level, that scattering system will also run. Same can work for walls, roofs etc.
You can control density, what meshes that system will use and even bind some gameplay logic to it. In my case I made it to be pseudo random so I can generate different results simply by changing seed numbers.
When you have your own system, it also means you can expand it as much as you need. You can even scatter something out of something you already scattered. You can use line tracing to make objects follow ground or even change some visual aspects like colors based on some rules. Generic systems can scale nicely so these can be more local or they can cover very large areas.
You can also scatter actors that can then run some logic. In theory you can scatter building blueprints that will then construct random buildings. Obviously there needs to be some limits and it might not be the most optimal way to handle things but I’m sure you get the idea.
Don’t let the randomness limit you!
In Unreal we have two kinds of “randomness”. Fully random that will generate different results each time it runs and then we have the “pseudo random” that will generate same results each time if the seed number stays the same. I’m not a math guy so I can’t really go deeper with this unfortunately. I usually use the latter because most of the time I’m running these systems in the construction script that will run every time when the level loads. Fully random would create new results each time so it would be impossible to predict what the player would see and encounter during their gameplay. It’s still handy for bunch of things but I’m not recommending that for any important thing in your game.
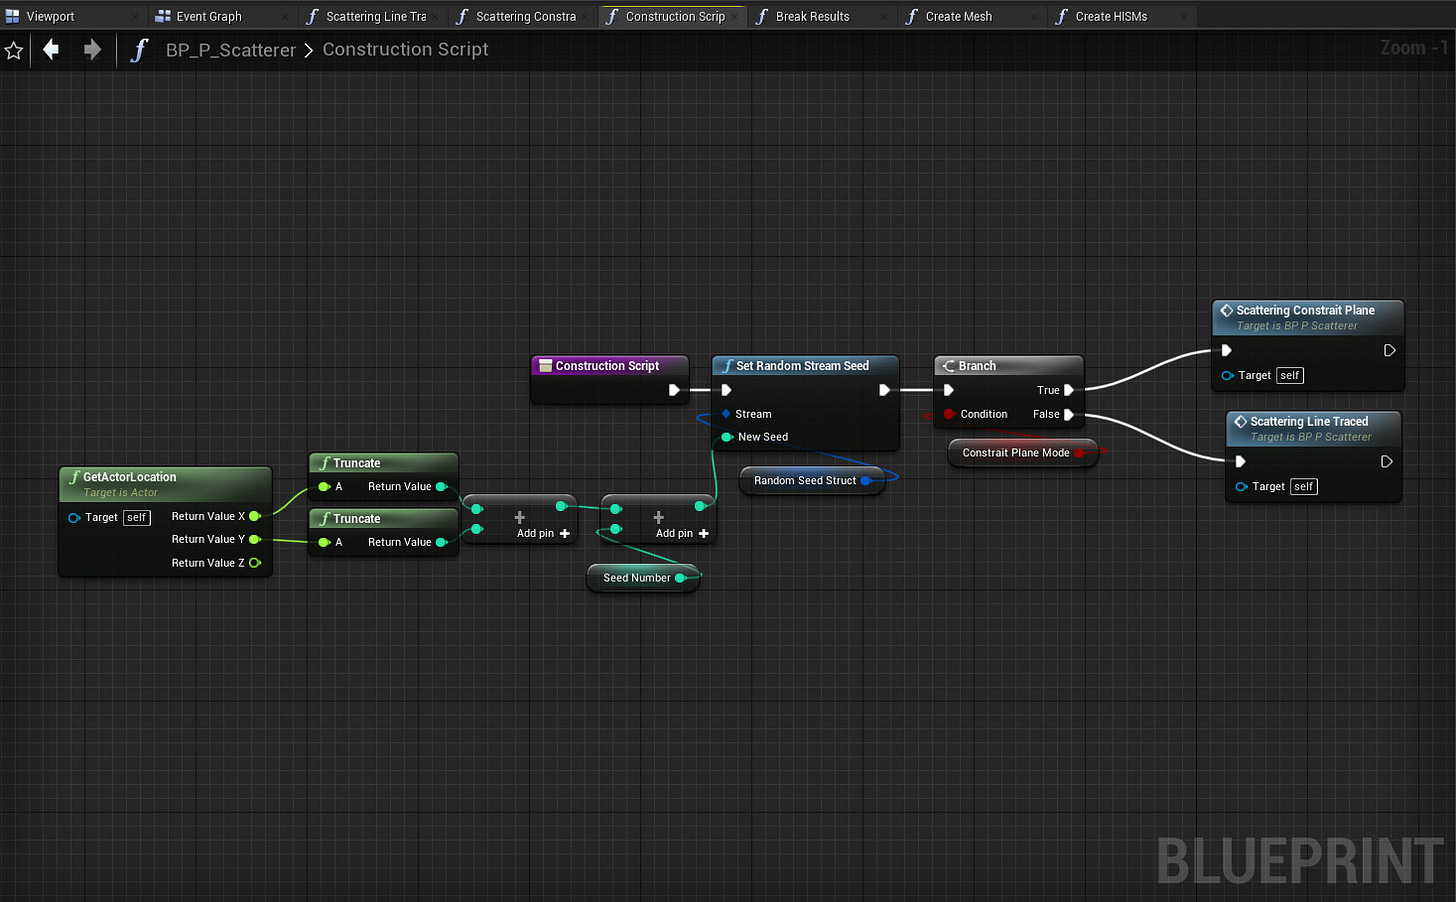
Pseudo random allows to set seed numbers that I can then store or change. That way I can be sure that I will get same results every time and if I want to change that then I can simply change the seed number. You can also use a trick where you can use actor world location to change seed number so you will get unique results for every scattering actor based on its location. You can still change seed numbers if you have to.
As you can see, making things randomly is not that hard. Because this system is heavily relying on random logic it can produce very odd and uniform results. That’s why it’s important to use as many different tricks as possible to make the end results more “organic”. Changing scales, rotations, color tints and randomly deleting some meshes can help with this but it’s not going to solve the main issue 100%. That’s why you need to think how to split systems. Maybe you can add trash somewhere and next to it some debris etc.. Basically try to think what would happen in real world to make things look believable.
Example Blueprint
This is a simple example of a basic, generic system that helps to scatter assets like meshes and actors. There are two modes, planar and line traced. Planar is much simpler so let’s start with that.
First thing we need to set up is the actual scattering area. To keep things simple, we will use a box collision but you can use other shapes too. That way we can tweak box extent to specify how large/small the scattering are will be. Then we will use a simple for loop that will control the density (how many assets we scatter). Now we need to get a random point from that scatter area (Constraint Plane). You can use a node “Random Point in Bounding Box” but that will be fully random location each time. Instead of that, we will build our own way to get that info but it will be pseudo random. Basically we just take the box extent and then figure out pseudo random location. Then we can run the Break Results function.
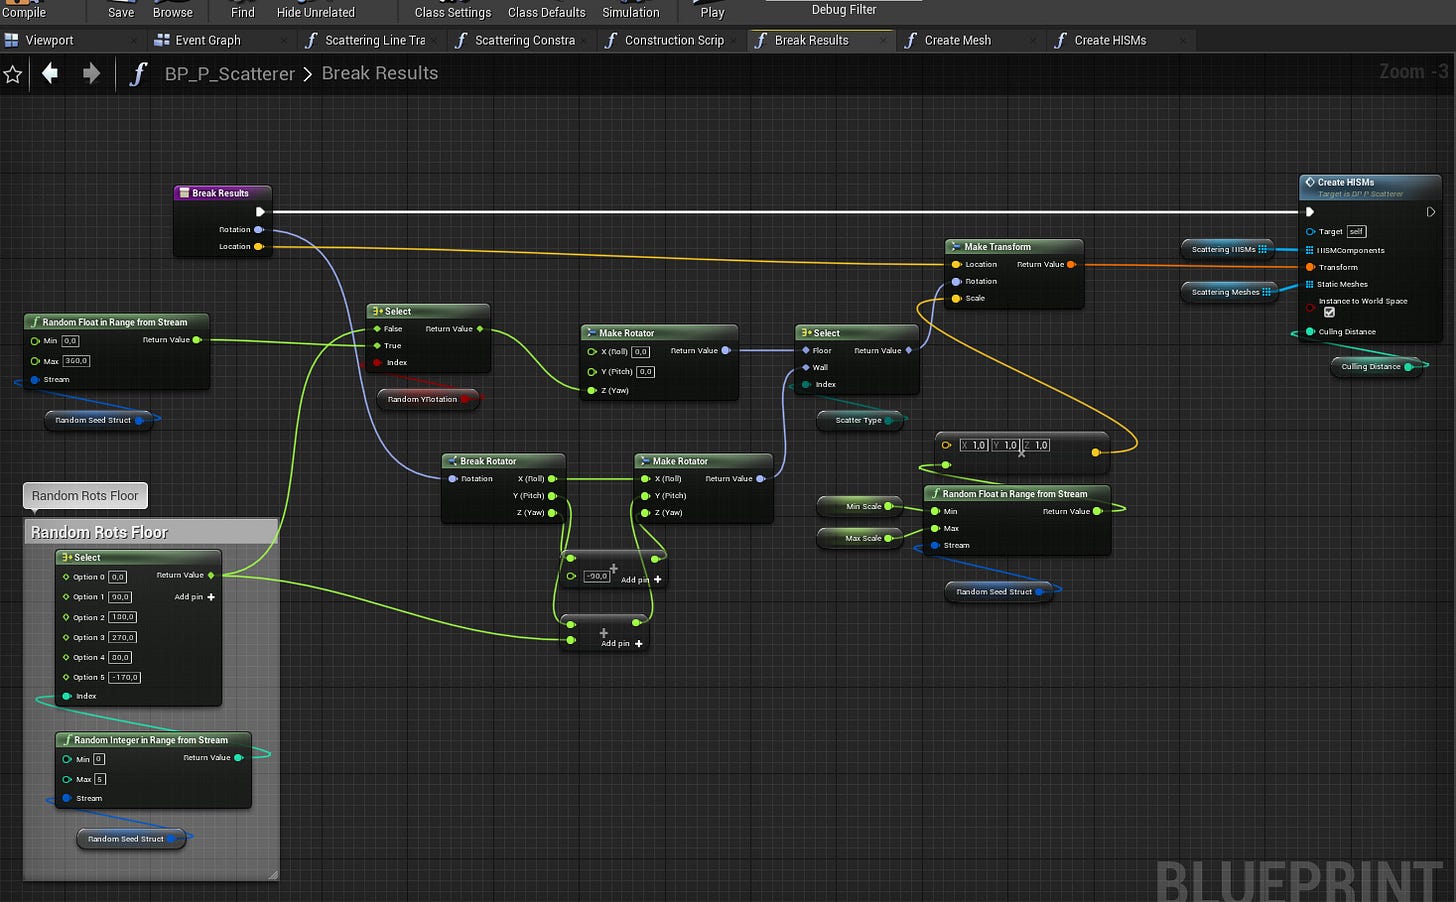
Break Results function is going to handle transforms. Transform consist of three values, location, rotation and scale. Location is something we can just pass through from our previous function. Rotation needs more logic because we want it to be more random. For flat surfaces we usually only need to set yaw so we can simply select a random float or you some pre existing values. Then we also have wall option that requires a different logic. Scale is the last part and we can use two float variables to control min and max scales. After that we can run the Create HISM function that will generate instanced meshes. You can read more about that here. You can also use the same logic for actors too so instead of running the Create HISM logic, you can simply use the “Add Child Actor Component”.
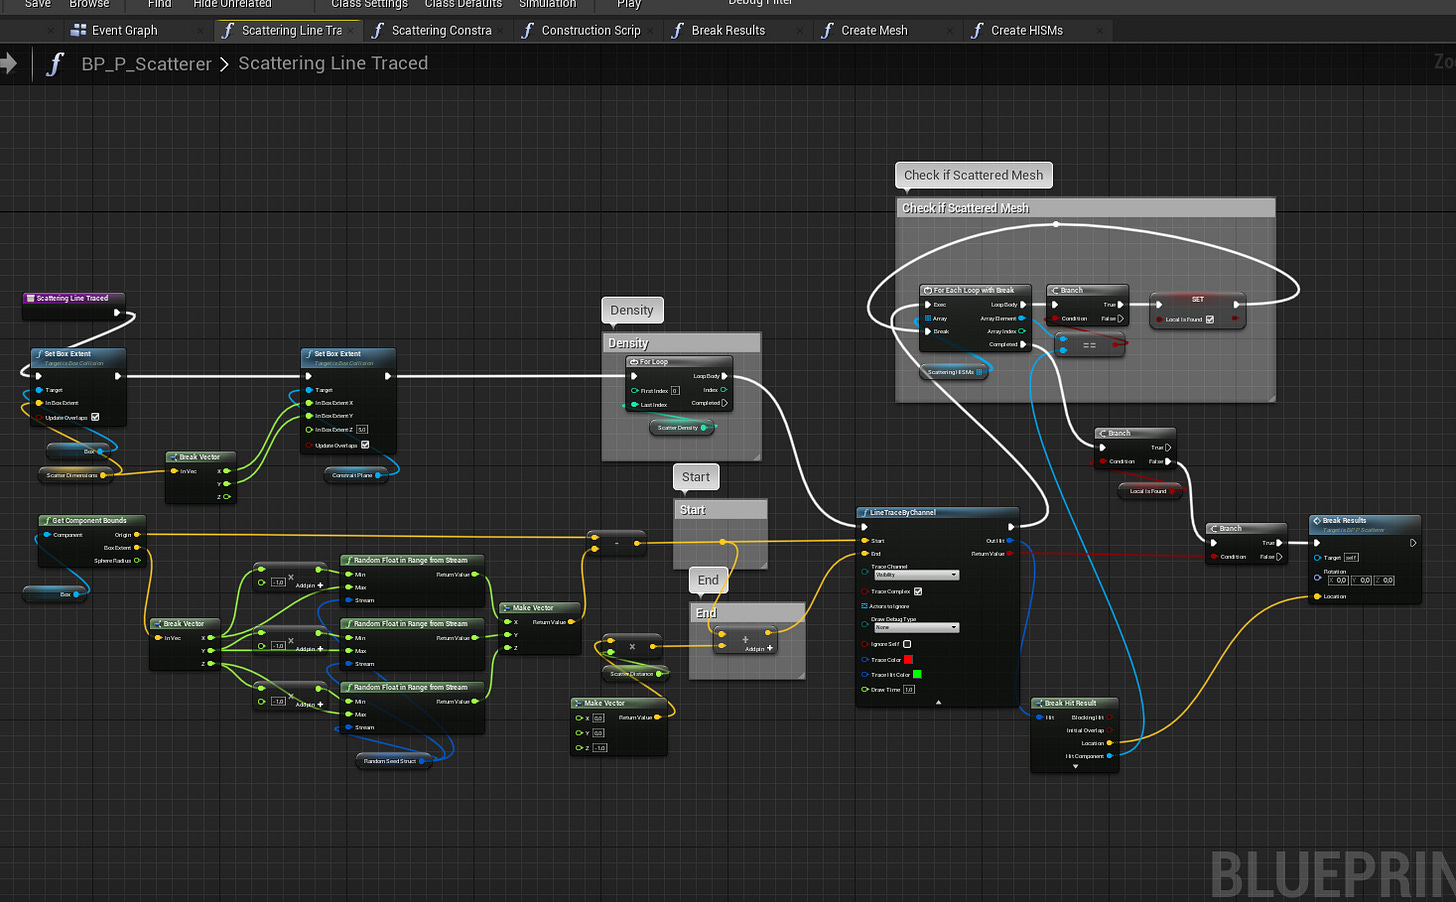
Line traced method is a bit more complex but follows the same idea for the most part. We are setting that scattering area, get random location from it and then set trace start and end locations. Then we will break hit results to get a location where that line hits. I also made a simple system to prevent assets from piling up too much so if that line hits with something we already scattered then it will skip that. After that it will run the same Break Results function.
Think about practical performance
Adding things is easy but how to make sure the performance won’t suffer? First thing to keep in mind is how much draw calls something is creating. For debris you want to spend as little as possible because most of the time it’s not that important in the grand scheme of things. That’s why instanced meshes are a good choice. You can read more about them in my last article.
Another thing is the actual polygon count. If you are using HIMSs (hierarchical instanced static meshes) then you can use LODs (level of detail). This will help to keep polycount at minimum.
Best way to optimize render cost is to just skip the whole rendering. That’s why correct culling distances are important. You can manually set that for each static mesh or instance mesh component or you can use culling volume to take care of them.
Last thing to keep in mind is the collision. You don’t really need to have collision for small things like debris. It can introduce issues for physics and players but can also cause performance spikes during gameplay. That’s why it’s usually a good idea to disable collisions for small meshes.
Why blueprints?
Obviously you can use C++ to create these systems even more in depth. You can also use tools like Houdini but blueprints allow you to have something that many of us “non programmers” can understand. Blueprints are also built in so anyone can access to them. Artists can tweak and expand systems based on their needs too.
With blueprints you can control each of these aspects mentioned before and create child blueprints with correct values for different usage, like presets. Trash might need to have collision and culling distance can also be longer, maybe you need shadow casting etc.. Smaller debris doesn’t need collision or shadows and you can cull that faster too. These actors can then be simply dragged & dropped in to a level.
Blueprints have some real limitations that you should be aware of. You can’t really have lots of complex things in your level that uses constriction script because there are certain loop limit that will cause issues if you go over it. That’s why it’s important to optimize blueprints and be cleaver how to handle things.
Until next time,
Kimmo K.
You can also find me in the following places too:
UE Marketplace Artstation Twitter Facebook Youtube


